In this post, I am showing how I make a fan block in easy way. My fan blocks are not precise fan shape. It's a little wonky since I just saw following my desire.
What I made with fan blocks are these this time - Coasters -. Actually, my quilting ladies said "These are pot holders. It's too big as a coaster."


When you make a fan block, do you cut a paper pattern from your book? It's easy to make a fan pattern in your own size without cut the printed pattern.
1. I use the paper piecing method for a fan block. The paper I used here was thin which was used for packaging materials as a filler.
2. Cut the paper in square in the size you like for your project. Here, I am trying to make 4 coasters. My square size is 7".
3. First, make a fan pattern using the square - one quarter of circle and the rest.
Fold the square diagonally in half.
4. Fold is in half again, and again, and again... until it gets narrow.
5. Mark the point with a pen where you would like. This point will make a radius of your quarter circle. I marked at 3.5" point which will make a 3.5" radius of quarter circle.
6. And cut it at the point you marked.
7. Open up the 2 pieces of paper.
Here are the pattern of a fan block.
8. By folding the square several or more times diagonally, the lines can be guidelines when you actually sew fabric strips onto the paper, which means no need to draw lines.
Make necessary quantities of the patterns for your projects in the same way. I made 4 for my coasters.
9. Cut some stripes for the fan part.
10. Place the first strip on the fan paper pattern right side up, then place the second strip on the first strip right side down, and sew.
11. Flip the second strip, place the third strip on the second strip, and sew. Use the guidelines of folded lines of paper so that it will look like a fan when all pieces were sewn on the paper. Don't forget to leave some extra strip for both tops (most outside of the fan; the end of the square) and bottom (inside of the fan; curved part) so that you don't have to be shocked later when you find the strip didn't cover the paper area when the sewn strip is flipped.
Keep adding the strips until the end.

Also, don't forget to trim the seam allowances.


12. This is how it looks like when all the strips are sewn on the paper.


13. Trim the edges and the curve. Leave seam allowance for the curve. It looks like this.


14. Cut the core - one piece of fan shape - part fabric. Add seam allowance to the curve part.

Mark the half point by pressing.

On the body side, too.

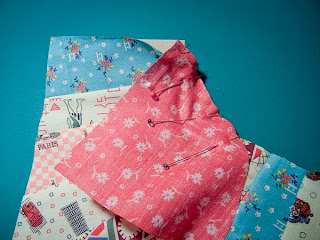
15. Lay the two pieces right side together like this. Match the center mark of both pieces.

Pin them and sew.


16. Here is the completed block.

It's very easy to make the template, isn't it? :D
You don't need any writing tools!


Hope you enjoyed this post.
And, hope you are having wonderful weekend :)


